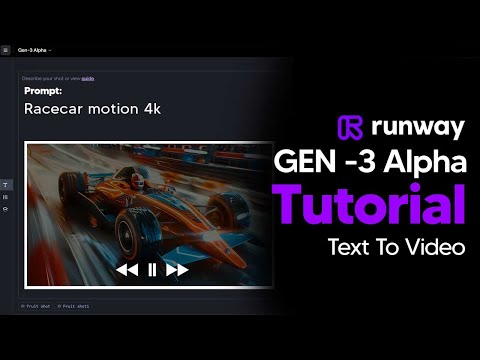
Unlock the Power of Runway Gen-3 Alpha: A Comprehensive Tutorial
Unlock the power of Runway Gen-3 Alpha with this comprehensive tutorial. Learn how to generate videos with remarkable accuracy, explore camera styles, lighting techniques, movement types, and text styles to enhance your video projects. Optimize prompts, manage your credits, and discover customization features for seamless video creation.
October 6, 2024
Unlock the power of Runway Gen-3 Alpha and create stunning, high-quality videos with remarkable accuracy. This comprehensive guide covers everything you need to know, from managing your credits to crafting detailed prompts that will elevate your video projects to new heights.
Checking Your Credits
Setting the Generation Time to 5 Seconds
Crafting Detailed Prompts for Better Results
Comparing Prompt Descriptions and Their Impact
Reusing Settings and Accessing Prompt Details
Exploring Camera Styles, Lighting, and Movement Types
Understanding Textual Styles and Aesthetics
Using a Custom GPT-based Prompt Generator
Conclusion
Checking Your Credits
Checking Your Credits
Before generating any videos, it's important to check your available credits. Here's what you need to know:
- You can see your current credit balance in the top right corner of the Runway interface.
- Gen 2 videos use 5 credits per second of video generated, while Gen 3 Alpha uses 10 credits per second.
- If you're on the normal $12/month plan, you typically start with 625 credits, which is around 60 seconds of footage.
- With a better plan, you'll get more credits, but it's still important to be aware of your credit usage.
To avoid burning through your credits too quickly, it's recommended to start with the 5-second generation option. This allows you to test and refine your prompts without depleting your credits too fast.
Setting the Generation Time to 5 Seconds
Setting the Generation Time to 5 Seconds
When you first start generating prompts with Runway's Gen 3 Alpha, it's recommended to set the generation time to 5 seconds. This is because your initial prompts may not be as detailed or accurate, and you'll likely need to refine them. By setting the generation time to 5 seconds, you can test out more prompts while still preserving your credits.
The Gen 2 model uses 5 credits per second of video generated, while the Gen 3 Alpha uses 10 credits per second. If you start with the standard $12/month plan, you'll have 625 credits, which is around 60 seconds of footage. By setting the generation time to 5 seconds, you can test twice as many prompts with the same amount of credits, allowing you to refine and improve your descriptions before using up your credits.
This approach helps you avoid burning through your credits too quickly, especially when you're just starting to use Runway's AI video generation capabilities. Once you've refined your prompts and are getting the results you want, you can then increase the generation time to 10 seconds or more.
Crafting Detailed Prompts for Better Results
Crafting Detailed Prompts for Better Results
When generating videos with Runway's Gen 3 Alpha, it's crucial to provide detailed prompts to achieve the best results. The more descriptive your prompt, the more accurate and coherent the generated footage will be.
Here are some key tips for crafting effective prompts:
-
Describe the Scene in Detail: Don't just use basic keywords like "fruit on a table". Provide a more comprehensive description, such as "a wide establishing shot of various vibrant fruits sitting on a wooden table in a lush, green jungle setting with diffused lighting and exotic foliage surrounding the scene."
-
Specify Camera Angles and Movements: Use terms like "low angle", "high angle", "overhead", "first-person view", "handheld", "tracking", etc. to direct the camera perspective and movement.
-
Incorporate Lighting Techniques: Describe the lighting style, such as "soft, diffused lighting", "silhouette lighting", "backlighting", "side lighting", "lens flare", "Venetian lighting", etc.
-
Convey Desired Moods and Aesthetics: Use descriptors like "moody", "cinematic", "iridescent", "home video/VHS", "glitchcore", etc. to set the overall tone and visual style.
-
Specify Text Styles: If you want to incorporate text, mention the desired style, such as "bold", "graffiti", "neon", "varsity", or "embroidery".
-
Leverage Custom Presets: Save your successful prompts as custom presets for easy reuse and consistency across your projects.
By following these guidelines, you'll be able to generate more accurate, coherent, and visually compelling footage with Runway's Gen 3 Alpha. Remember, the more detailed your prompt, the better the results.
Comparing Prompt Descriptions and Their Impact
Comparing Prompt Descriptions and Their Impact
The video demonstrates the importance of providing detailed and specific prompts when using Runway's Gen 3 Alpha model. The key points are:
- A simple prompt like "Fruit sitting on a table in the jungle" can sometimes produce better results than an overly descriptive prompt.
- The first prompt, with a basic description, resulted in a coherent and high-quality image of various fruits on a table in a jungle setting.
- The second prompt, with a more detailed "establishing wide shot" description, did not produce any actual fruits on the table, but rather a more cinematic, wide-angle shot of the jungle environment.
- This suggests that for close-up shots, a more focused and specific prompt may be better, while for establishing shots, a broader description can be effective.
- The video also demonstrates how to use the "Reuse Settings" and "Copy Prompt" features to maintain consistency across generations and save time.
- Additionally, the custom presets feature allows users to save frequently used prompts for easy access, streamlining the creative process.
- The video then provides a comprehensive overview of various camera angles, lighting techniques, movement types, and aesthetic styles that can be incorporated into prompts to enhance the generated videos.
Overall, the key takeaway is that crafting detailed, thoughtful prompts is crucial for obtaining the desired results when using Runway's Gen 3 Alpha model, and the video provides valuable guidance on how to do so effectively.
Reusing Settings and Accessing Prompt Details
Reusing Settings and Accessing Prompt Details
Once you have your generations done, you can do many different things. For example, you can click "Reuse the settings" and then if you click "Reuse" like this, you can see it reloads everything and you are able to once again run this prompt if you simply liked it.
What you can also do is click "Copy prompt". This will show you the entire prompt and it will display all the different details that you can use to reuse this prompt in other projects. For example, you can see that the seed is provided, and if you copy this seed, you can then paste it in the settings tab to use a similar shot or environment.
This is really useful if you're trying to generate some consistency between your works. Another button you might want to click is "Remove Watermark" or "Keep Watermark" depending on where you're sharing the content. If you're using this for professional projects, be sure to turn the watermark off.
Finally, don't forget to right-click and download your video. This will allow you to easily download the video in 720p with remarkable accuracy.
Exploring Camera Styles, Lighting, and Movement Types
Exploring Camera Styles, Lighting, and Movement Types
Starting with the camera styles, we have:
- Low Angle Shots: Taken from below the subject, making them appear larger and more imposing. Useful for emphasizing power, dominance, and importance.
- High Angle Shots: Taken from above the subject, making them appear more vulnerable. Useful for conveying vulnerability, insignificance, and defeat.
- Overhead Shots: Taken directly above the subject, providing a bird's eye view. Useful for mapping out scenes, showing spatial relationships, and providing context.
- FPV (First-Person View): Simulates the perspective of the character, putting the audience in their shoes. Useful for immersive experiences, action scenes, and POV storytelling.
- Handheld Shots: Captured with a handheld camera, creating a shaky and raw look. Useful for realism, intensity, and a documentary feel.
- Wide Angle Shots: Capture a broad view of the scene, including more of the surroundings. Useful for establishing shots, landscapes, and large group scenes.
- Close-Up Shots: Focus tightly on the subject, often showing just the face or a specific detail. Useful for highlighting emotions, details, and important elements.
- Macro Shots: Extreme close-ups revealing tiny details not visible to the naked eye. Useful for nature documentaries, scientific visuals, and showcasing intricate details.
- Over the Shoulder Shots: Shots taken from behind a character, showing their perspective. Useful for conversations, character interactions, and creating a sense of perspective.
- Tracking Shots: Follow the subject as they move, maintaining a consistent frame. Useful for following characters and dynamic storytelling.
- Establishing Wide Shots: Set the scene, showing the set and the context for the action. Useful for introducing locations, providing context, and setting the tone.
- 50mm Lens Shots: Have a natural perspective similar to human vision. Useful for a natural look, balanced framing, and versatile shooting.
- Snor Cam Shots: Attach the camera to the actor, keeping them in the frame while the background moves. Useful for intense, disorienting effects and immersive perspectives.
- Realistic/Documentary: Mimics the look of documentaries, focusing on realism and authenticity. Useful for real-life stories, nature, interviews, and factual content.
- Camcorder: Replicates the look of home videos with a raw and unpolished feel. Useful for nostalgia, personal stories, and casual footage.
Moving on to lighting techniques, we have:
- Diffused Lighting: Soft and even, reducing hard shadows. Useful for portrait photography, product shots, and creating a calm atmosphere.
- Silhouette Lighting: Places the light source behind the subjects, creating a dark outline with a bright background. Highlighting the subject's shape.
- Lens Flare: Occurs when light hits the camera lens directly, creating a streak of light or an array of light spots. Useful for action scenes, dreamy sequences, or adding a cinematic touch.
- Back Lighting: Illuminates the subject from behind, creating a rim of light around the edges and separating the subject from the background. Useful for portraits, highlighting outlines, and creating depth.
- Side Lighting: Hits the subject from one side, creating strong shadows and highlights. Useful for emphasizing texture and depth, creating drama.
- Gel Lighting: Uses colored gels placed over lights to cast specific hues, adding mood or thematic elements to a scene. Useful for music videos, theatrical scenes, or creating a certain mood.
- Venetian Lighting: Simulates the effect of light filtering through blinds, creating a pattern of light and shadow. Useful for noir films, dramatic scenes, and creating intention.
Finally, let's explore the different movement types:
- Dynamic Motion: Captures fast-paced and fluid movements, conveying energy and excitement. Useful for action sequences, sports videos, and energetic scenes.
- Slow Motion: Stretches the time of the action, emphasizing details and allowing viewers to see intricate movements more clearly. Useful for dramatic moments, showcasing details, and emotional scenes.
- Hyper Speed: Dramatically speeds up the action, often used to condense time or show rapid progressions. Useful for time-lapse sequences, fast-paced scenes, and showing rapid changes.
- Time-Lapse: Compiles images taken over a long period into a short sequence, showing the gradual changes quickly. Useful for nature documentaries, urban growth, and showing the passage of time.
These camera styles, lighting techniques, and movement types can be combined and utilized to enhance your video projects, creating a wide range of visual styles and storytelling possibilities.
Understanding Textual Styles and Aesthetics
Understanding Textual Styles and Aesthetics
Now let's take a look at some of the text styles and aesthetics that Runway has, as it truly excels in this area.
Bold: This text is thick and strong, emphasizing important words or phrases. Use these for headlines, emphasis, and making certain statements.
Graffiti: Graffiti text mimics the look of street art with expressive, often colorful lettering that adds a rebellious, urban vibe. Use these for urban themes, youth projects, and street culture.
Neon: Neon text looks like glowing signs, often used for vibrant, retro, or cyberpunk aesthetics. This is useful for nightlife scenes, retro themes, and eye-catching visuals.
Varsity: Varsity text resembles the blocky, stylized letters found on sports jerseys, evoking high school spirit and athleticism. This is useful for sports themes, school events, and team branding.
Embroidery: Embroidery text looks like stitched fabric, adding a tactile, handmade feel to the text. This is useful for handmade projects, handmade aesthetics, and adding texture.
By understanding and utilizing these various text styles and aesthetics, you can enhance the visual impact and thematic elements of your video projects.
Using a Custom GPT-based Prompt Generator
Using a Custom GPT-based Prompt Generator
To generate a more detailed and effective prompt for Runway's Gen 3 Alpha, you can use a custom GPT-based prompt generator. This tool can help you craft a comprehensive description that captures the desired scene, camera angles, lighting, movement, and aesthetic.
Here's an example of how you can use the custom GPT prompt:
- Copy the following prompt:
Establish a wide shot of various fruits sitting on a table in a lush, vibrant jungle environment. The camera should capture the rich, green foliage and exotic flora surrounding the table. Use diffused, natural lighting to create a calm, serene atmosphere. Include a macro close-up shot to reveal the intricate details and textures of the fruits.
- Paste the prompt into the Runway's prompt generator and click "Generate".
This more detailed prompt should result in a more accurate and visually compelling video generation compared to a basic, one-line description. The custom GPT-based prompt covers key elements like camera angles, lighting, and specific details to guide the AI in creating the desired scene.
By leveraging the power of a custom prompt generator, you can take full advantage of Runway's Gen 3 Alpha capabilities and produce high-quality, cinematic video generations with remarkable accuracy.
Conclusion
Conclusion
In this comprehensive guide, we have explored the powerful capabilities of Runway's Gen 3 Alpha model for generating high-quality video content. We've covered a range of topics, including understanding your credit usage, crafting detailed prompts, leveraging custom presets, and utilizing various camera styles, lighting techniques, movement types, and aesthetic choices to enhance your video projects.
The key takeaways are:
-
Credit Management: Be mindful of your credit usage, as Gen 3 Alpha consumes 10 credits per second of video generated. Start with the 5-second option to test and refine your prompts efficiently.
-
Prompt Crafting: Detailed and descriptive prompts are crucial for achieving the desired results. Use the provided examples and guidelines to craft prompts that capture the essence of your vision.
-
Custom Presets: Leverage the custom presets feature to save time and maintain consistency across your projects by storing and reusing your favorite prompts.
-
Camera Styles and Techniques: Explore the diverse range of camera styles, lighting setups, and movement types to create visually compelling and impactful footage.
-
Aesthetic Choices: Experiment with different text styles, moods, and visual aesthetics to set the tone and enhance the overall look and feel of your video projects.
Remember, the more you practice and refine your prompts, the better the results you'll achieve with Runway's Gen 3 Alpha model. Embrace the creative possibilities and let your imagination soar as you bring your video ideas to life.
FAQ
FAQ